 By Owen Palmer
Updated November 2026
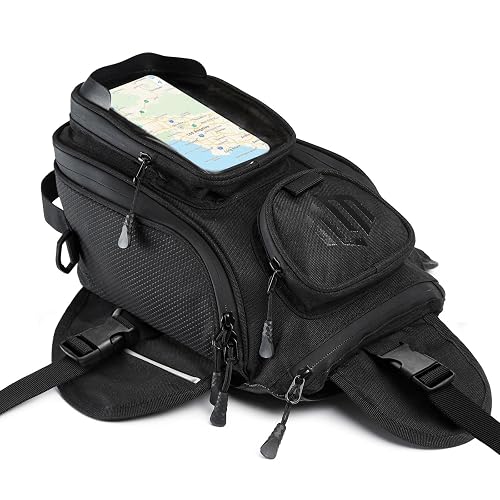
A camera bag for bike riding needs to do two jobs at once: protect your camera from bumps and vibration, and stay stable while you pedal. This guide walks you through the factors that matter most, from mounting style to padding, so you can choose a bag that fits your camera and your riding. By the end, you will know what to look for and how to set the bag up correctly.
Step 1: Decide Where the Bag Will Mount
Your mounting location shapes everything else about the bag. Most camera bags attach in one of three places, and each has trade-offs.
Shopping for one? See our guide: 5 Best Bags for Foldable Bike Options for Commuters and Travelers (2026).
- Handlebar: Quick to reach and good for stopping to shoot, but it adds weight to the front end and can interfere with cables and lights.
- Top tube or frame: Keeps the load low and central, which helps handling. Space is tight on smaller frames.
- Rear rack or seat post: Usually the most stable option for heavier kits. It can be harder to reach while riding.
If you plan to stop and shoot often, a handlebar or top-tube setup will save time. If you ride fast or on rough trails, a lower, rear-mounted bag will feel steadier. For more detail on mounting, see Side Bag for Bike: How to Choose and Mount the Right One (2026) and Rear Bag for Bike: How to Choose and Mount the Right One (2026).
Step 2: Measure Your Camera Setup
Before you shop, measure your camera with its most-used lens attached. Note the length, width and height, and add about 1 inch of extra room on each side for padding. Manufacturers list internal dimensions, so compare those numbers against your measurements rather than relying on the outside size of the bag. If you carry a second lens or a flash, measure the full kit together.
Step 3: Check Padding, Protection and Weather Resistance
Vibration and drops are the main threats to a camera on a bike. Look for these features:
- Removable dividers that let you customize compartments around your gear
- Thick, closed-cell foam padding rather than thin, compressible padding
- A rigid or semi-rigid base to absorb impacts
- Water-resistant fabric and a rain cover or weatherproof zippers
- Secure closures, such as buckles or roll-top designs, that will not pop open over bumps
Owners often report that a bag with a firm base and tight-fitting dividers keeps lenses from knocking together, even on rough pavement.
Step 4: Test Fit and Stability Before Riding
Once the bag arrives, mount it on the bike without the camera inside, then load your gear and check the following:
- Confirm the bag does not touch your wheels, brake lines, shifter cables or pedals at full steering lock.
- Push the bag side to side and up and down. It should feel firm, with no rattling.
- Ride a short loop at low speed, then check that the straps have not loosened and the camera has not shifted.
If the bag sways, tighten the mount, add a strap or move the load lower. For general handling tips, see Handlebar Bag Road Bike: 3 Best Picks for Commuters and Riders (2026).
Common Mistakes to Avoid
- Buying by outside size instead of checking internal dimensions.
- Overloading a bag that is not rated for the weight.
- Leaving the camera in direct sun or in a hot bag for long periods.
- Skipping a rain cover on rides where the forecast is uncertain.
- Mounting the bag where it blocks cables or lights.
Recommended Gear
- Padded camera insert dividers: Custom dividers let you fit the bag to your exact kit, which reduces movement. View on Amazon
- Bike frame strap kit: Extra straps help lock a bag in place on rough terrain. View on Amazon
- Bike rain cover: A fitted cover protects the bag and its contents in wet weather. View on Amazon
FAQ
Can I use a regular camera bag on a bike?
Some can, but most standard camera bags are designed to be carried by hand or on the shoulder. A bike-specific bag usually has a mounting system and a stable shape that resists swaying.
How do I keep my camera safe from vibration?
Use thick, closed-cell padding, keep the camera snug between dividers, and mount the bag low and centered. Check the straps regularly, since they can loosen over time.
Is a handlebar mount better than a rear mount?
It depends on your riding. Handlebar mounts give quick access, while rear mounts are usually more stable. Try both setups if you can and choose the one that suits your style.
Conclusion
A good camera bag for bike riding combines a secure mount, firm padding and weather protection. Measure your gear, choose a mounting position that fits how you ride, and test the setup at low speed before you go far. Check manufacturer specifications and confirm compatibility with your bike before buying.
Related reading
Ready to choose one?
About Owen Palmer
Owen Palmer is part of our editorial team and reviews and edits our bike accessories guides, checking product details against manufacturer specifications and owner feedback.